Table of Contents
ToggleA flat-screen TV deserves more than tinny built-in speakers. If dialogue gets lost in action scenes or explosions sound like popcorn popping, it’s time to upgrade to a dedicated surround sound system. Sony’s home theater systems deliver cinema-quality audio without requiring an AV installer or a second mortgage. Whether someone’s watching blockbusters, streaming concerts, or gaming until 2 a.m., the right setup transforms a living room into an immersive experience. This guide breaks down what makes Sony systems worth considering, which models deliver the best bang for the buck, and how to set them up for maximum impact.
Key Takeaways
- Sony home theater surround systems use proprietary technologies like 360 Spatial Sound Mapping and support Dolby Atmos and DTS:X to create immersive three-dimensional audio that outperforms standard TV speakers.
- The Sony HT-A7000 is the best overall option for cinematic sound with its 7.1.2-channel setup and wireless rear speaker compatibility, while the HT-S400 offers a budget-friendly 2.1-channel alternative for smaller rooms under $300.
- Room size is the primary factor in choosing a Sony surround system—rooms under 200 sq ft need 2.1 or 3.1 setups, while larger spaces and open-concept layouts benefit from 5.1, 7.1, or Atmos-enabled configurations.
- Proper calibration, wall mounting into studs for safety, and strategic subwoofer placement using the ‘subwoofer crawl’ method are essential for maximizing sound performance and immersion.
- Sony’s HDMI eARC connectivity and HDMI 2.1 support with VRR enable gaming-optimized setups for PS5 and Xbox Series X with minimal audio lag, making Sony systems ideal for both movies and gaming.
- Installation takes under an hour with proper planning—budget for the complete ecosystem including rear speakers ($300–$350) and quality HDMI cables, and always update firmware after setup for optimal performance.
What Makes Sony Home Theater Surround Systems Stand Out
Sony’s been engineering audio equipment since 1946, and that experience shows in their home theater lineup. Their systems use proprietary tech like 360 Spatial Sound Mapping, which analyzes room acoustics and optimizes speaker output to create phantom surround channels, basically making sound feel like it’s coming from above and behind without installing ceiling speakers.
Most Sony systems use Dolby Atmos and DTS:X decoding, the current gold standards for object-based surround sound. Unlike older channel-based formats, these technologies place individual sounds (a helicopter overhead, rain from the left) in three-dimensional space. That’s a noticeable upgrade from basic 5.1 setups.
Build quality matters when speakers sit in a living room for years. Sony uses rigid cabinet construction and S-Force PRO Front Surround processing in their soundbars to minimize vibration rattle and maintain clarity at high volumes. Their wireless subwoofers typically pair automatically via Bluetooth, no running cables across the room or drilling through walls.
Connectivity options include HDMI eARC (enhanced Audio Return Channel), which passes high-resolution audio from a TV back to the soundbar without a separate optical cable. Most 2024-2026 models also support HDMI 2.1 features like 4K/120Hz passthrough and VRR (Variable Refresh Rate) for gaming consoles. That means plug the PlayStation 5 or Xbox Series X into the soundbar, then a single cable to the TV.
Many reviews from sources like Good Housekeeping’s soundbar roundups highlight Sony’s balance of performance and price, particularly in the mid-range segment where competitors often sacrifice either features or sound quality.
Top Sony Surround Sound Systems for Your Home Theater
Best Overall: Sony HT-A7000 with Rear Speakers
The HT-A7000 is a 7.1.2-channel soundbar that punches well above its form factor. It includes two up-firing drivers for Atmos height effects, built-in dual subwoofers, and Sony’s Vertical Surround Engine to simulate overhead audio. At 51 inches wide, it fits under most 55-inch or larger TVs without blocking the IR sensor.
Pair it with Sony’s SA-RS3S wireless rear speakers (sold separately), and the system delivers true surround sound. The rear speakers are battery-powered, they charge on included cradles, so placement is flexible. No visible wires running along baseboards.
Sound performance is crisp across frequencies. Dialogue remains intelligible even during chaotic action scenes, thanks to a dedicated center channel. Bass response from the built-in subs handles most content, but adding Sony’s SA-SW5 or SA-SW3 wireless subwoofer fills out explosions and low-frequency effects for larger rooms (300+ sq ft).
Setup takes about 20 minutes. Plug in the power cable, run one HDMI cable to the TV’s eARC port, and the soundbar walks through calibration using its built-in microphones. The rear speakers sync automatically when powered on within range.
Street price hovers around $1,200-$1,400 for the soundbar alone, with rear speakers adding another $300-$350. That’s competitive with similar Sonos or Samsung setups, but Sony’s 360 Reality Audio support gives it an edge for users with compatible streaming services like Tidal or Amazon Music HD.
Best Budget Option: Sony HT-S400 Soundbar System
For rooms under 250 square feet or users who don’t need Atmos, the HT-S400 delivers solid 2.1-channel sound at a fraction of the cost. It’s a 35.4-inch soundbar with a wireless subwoofer, making it ideal for bedroom setups or apartments where loud bass annoys neighbors.
The subwoofer uses a 6.3-inch driver and wireless connectivity. It’s compact enough to tuck behind a couch or under a console table. Maximum output is 330W, enough to fill a typical living room without distortion at 75% volume.
This model skips advanced features like room calibration and Atmos, but it includes Bluetooth 5.0 for streaming music and an optical input for older TVs. HDMI ARC (not eARC) handles basic audio from the TV. Gaming mode reduces audio lag to under 40ms, acceptable for most casual play.
Setup is plug-and-play. Connect the soundbar to the TV via HDMI or optical, pair the subwoofer (happens automatically on first power-up), and adjust bass levels using the remote. Total time: 10 minutes.
Retail price typically runs $250-$300, occasionally dropping to $200 during Black Friday or Prime Day sales. For that budget, it outperforms TV speakers by a wide margin and provides a foundation to upgrade later, Sony’s ecosystem allows adding rear speakers or a beefier sub to most models.
According to testing from publications like Tom’s Guide, budget soundbars in this range struggle with clarity at high volumes, but the HT-S400 maintains separation between dialogue and background music better than comparably priced options from Vizio or TCL.
How to Choose the Right Sony System for Your Room
Room size dictates power requirements. For spaces under 200 square feet (a typical 12×16 bedroom), a 2.1 or 3.1 system like the HT-S400 provides adequate coverage. Rooms 200-400 square feet benefit from 5.1 setups with rear speakers. Anything larger, especially open-concept layouts, needs 7.1 or Atmos-enabled systems to avoid dead zones where sound feels thin.
Ceiling height affects Atmos performance. Up-firing speakers work best with flat ceilings 8-10 feet high. Vaulted or textured ceilings scatter sound reflections, reducing the overhead effect. In those cases, stick with traditional surround formats or invest in actual in-ceiling speakers (requires cutting drywall and running speaker wire, probably a job for an electrician unless someone’s comfortable with low-voltage wiring).
TV compatibility matters. Check the TV’s HDMI ports. HDMI ARC (Audio Return Channel) is standard on TVs from 2015 onward, but eARC (enhanced ARC) is required for lossless Dolby Atmos and DTS:X. If the TV only has ARC, the soundbar will still work, but audio gets compressed. Optical cables max out at 5.1 Dolby Digital, no Atmos support at all.
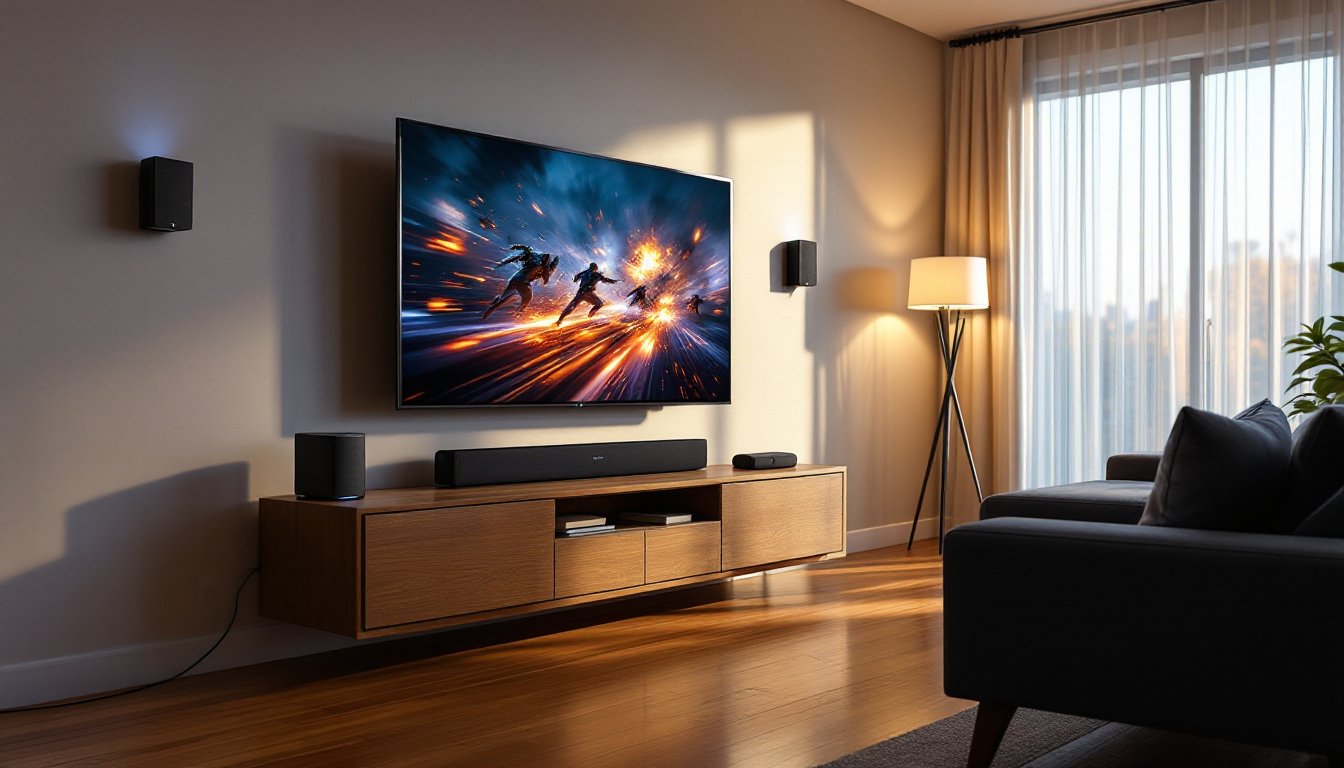
Furniture placement impacts sound. Soundbars perform best when wall-mounted at ear level (roughly 42 inches from the floor for seated viewers) or placed directly in front of the TV on a stand. Avoid tucking them inside closed media cabinets, doors and shelves block high frequencies. Subwoofers are less directional: corner placement amplifies bass through room gain, but that can cause boominess. Experiment with positioning 2-3 feet from walls for tighter, more controlled low end.
Budget should include accessories. Most Sony soundbars come with wall-mount brackets, but longer HDMI cables (Sony includes a short one) run $15-$25 for certified high-speed versions. Wireless rear speakers and subs are sold separately, adding $300-$600 to mid-range systems. Plan for the total ecosystem cost, not just the soundbar.
Gaming and streaming priorities shift recommendations. If someone games on PS5 or Xbox Series X, prioritize systems with HDMI 2.1 and VRR support (HT-A7000, HT-A5000). For music streaming, models with Chromecast built-in or Spotify Connect allow direct casting without tying up a TV. Resources like Popular Mechanics often test soundbars for gaming lag and streaming functionality in real-world scenarios.
Installation Tips for Optimal Surround Sound Performance
Run calibration before watching anything. Sony’s auto-calibration uses built-in or external microphones to measure room acoustics and adjust speaker levels. Place the mic (or phone running Sony’s app) at the primary seating position, not dead center of the room. Calibration takes 5-10 minutes and accounts for reflective surfaces like windows or hardwood floors.
Safety first when wall-mounting. Soundbars weigh 10-20 lbs depending on the model. Mounting into drywall alone will fail, use a stud finder to locate wall studs (typically spaced 16 or 24 inches apart). Drill pilot holes and use 3-inch wood screws rated for the soundbar’s weight plus a 50% safety margin. If studs don’t align with the desired position, install a mounting board (a 1×4 or 1×6 screwed into multiple studs) and attach the bracket to that. Wear safety glasses when drilling, drywall dust and wood chips fly.
Cable management prevents trip hazards and looks cleaner. Use adhesive cable clips or paintable cord channels to route HDMI and power cables along baseboards or behind furniture. If running cables through walls, check local codes, some jurisdictions require CL2 or CL3-rated in-wall cables for fire safety. That usually means hiring a low-voltage electrician unless someone holds a residential wiring permit.
Subwoofer placement affects bass quality. The “subwoofer crawl” method works: place the sub at the main seating position, play bass-heavy content, then crawl around the room’s perimeter listening for where bass sounds fullest and most even. That’s where the sub goes. Avoid placing it equidistant from two parallel walls, standing waves cause uneven bass response.
Rear speaker height should match ear level when seated. Mount wireless rear speakers 3-4 feet above the floor, angled slightly toward the listening position. If using stands instead of wall mounts, ensure they’re stable, a floor lamp-style stand works, but anything top-heavy risks tipping. Kids and pets make this a real concern.
Test multiple sound modes. Sony systems include presets like Cinema, Music, Game, and Night Mode (compresses dynamic range so explosions don’t wake roommates). Night Mode is useful, but critical listeners should stick with Cinema or Standard for uncolored sound. Avoid gimmicky “Bass Boost” settings, they distort at high volume.
Update firmware after installation. Sony releases periodic updates that fix bugs and add features. Connect the soundbar to Wi-Fi (via Ethernet or built-in wireless), then check for updates in the settings menu. Firmware updates take 10-15 minutes and shouldn’t be interrupted, don’t unplug mid-update or the system may brick.
PPE reminder: When drilling for mounts, wear safety glasses and ear protection if using a hammer drill on masonry or metal studs. Dust masks help if drilling into older drywall (pre-1980s homes may contain asbestos in joint compound, if unsure, test before disturbing).
Conclusion
Sony’s home theater systems scale from budget-friendly soundbars to full-blown Atmos setups, all engineered to deliver clear, immersive audio without requiring an acoustics degree. Match the system to room size, calibrate properly, and mount speakers securely, most installations take an hour or less. The difference between TV speakers and even a basic 2.1 system is night and day. For anyone serious about movies, music, or gaming, it’s one of the most noticeable upgrades in a home theater setup.