Table of Contents
ToggleSony DVD home theater systems represent a practical, all-in-one solution for upgrading a living room’s audio and video experience without piecing together separate components. These integrated systems bundle a DVD player with a multi-speaker surround sound setup, streamlining both the purchase and installation process. Though streaming has dominated recent years, DVD-based systems remain popular for homeowners who own physical media collections or want reliable playback without internet dependency. Understanding what these systems offer, and how to install them correctly, helps avoid the frustration of tangled cables, mismatched impedance, or subpar sound that plagues many DIY setups.
Key Takeaways
- A Sony DVD home theater system combines a DVD player with multi-speaker surround sound in a pre-calibrated, all-in-one package that simplifies installation compared to buying separate components.
- Proper speaker placement—center channel above/below the TV, front speakers at ear height angled 22–30 degrees, and rear speakers at ear height behind seating—is essential for balanced surround sound and immersive audio.
- Always use CL2 or CL3-rated in-wall speaker cable for concealed runs, maintain correct wire polarity (marked to red terminals), and run cables through stud edges at least 1-1/4 inches away to comply with safety codes.
- Auto-calibration microphones available on many Sony systems automatically adjust speaker distances and levels in 3–5 minutes, eliminating manual guesswork and compensating for room asymmetry.
- HDMI ARC connectivity reduces cable clutter by sending TV audio back through the same HDMI cable, allowing the Sony home theater system to handle sound from cable boxes, streaming devices, and gaming consoles.
- For typical 200–300 square foot living rooms, look for at least 100 watts RMS total power, and always match speaker impedance (standard 8 ohms) to avoid distortion and stress on the amplifier.
What Is a Sony DVD Home Theater System?
A Sony DVD home theater system is a packaged entertainment solution that combines a DVD player/receiver unit with multiple speakers designed to deliver surround sound. Unlike separates (where you buy a receiver, speakers, and disc player individually), these systems come calibrated to work together out of the box.
Most Sony systems use a 5.1 channel configuration: five satellite speakers (front left, center, front right, rear left, rear right) plus one powered subwoofer for low-frequency effects. The receiver decodes Dolby Digital and DTS audio tracks from DVDs, routing specific sound channels to the appropriate speakers. This creates directional audio, dialogue anchored to the center channel, ambient effects in the rear speakers, and bass handled by the subwoofer.
Sony positions these systems for mid-range home use. Total RMS power output typically ranges from 300 to 1,000 watts, sufficient for rooms up to 300 square feet without overpowering smaller spaces. The DVD player supports standard-definition DVDs: some models upscale to 1080p for compatibility with HDTVs, though true high-definition playback requires Blu-ray.
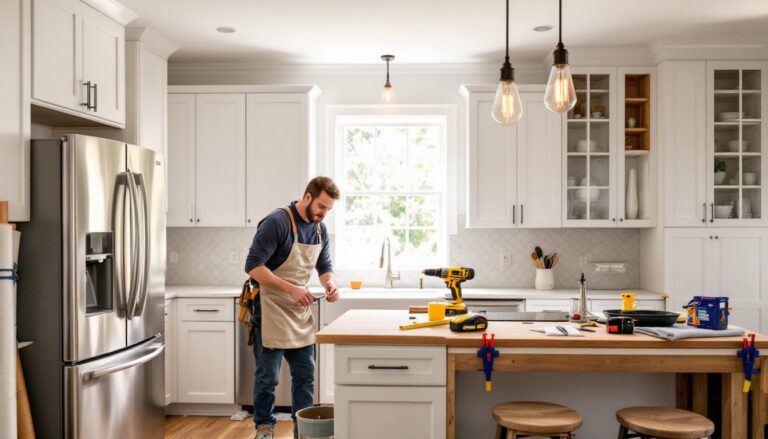
These systems don’t handle structural installation, they’re plug-and-play electronics. But, optimal speaker placement (which we’ll cover) affects room acoustics and may involve running speaker wire through walls, mounting brackets to studs, or drilling cable pass-throughs. Always check local codes if you’re opening walls: low-voltage speaker wire typically doesn’t require permits, but verifying with your jurisdiction prevents headaches.
Key Features to Look for in Sony DVD Home Theater Systems
Audio Quality and Speaker Configuration
The amplifier’s RMS (continuous) wattage matters more than peak watts, which manufacturers often inflate. For a typical living room (200–300 sq ft), look for at least 100 watts RMS total. Larger spaces or open-concept layouts benefit from 500+ watts to maintain clarity at moderate volume.
Speaker impedance is standardized at 8 ohms for most Sony home theater systems. Mismatching impedance (mixing 4-ohm and 8-ohm speakers, for instance) stresses the amplifier and causes distortion. Stick with the included speakers unless you’re comfortable calculating load.
Frequency response indicates the range each speaker reproduces. Subwoofers should reach down to 20–50 Hz for proper bass extension (explosions, orchestral lows). Satellite speakers handling mids and highs perform best from 100 Hz to 20 kHz. Many home theater setups rely on a good crossover point, the frequency where the subwoofer hands off to the satellites, to avoid muddiness.
Some Sony models include wireless rear speakers, eliminating the need to run 50 feet of speaker wire across a room. This simplifies installation in finished spaces where fishing wire through walls isn’t appealing. Trade-off: wireless speakers still need AC power, so you’ll need outlets near the rear speaker locations.
Connectivity Options and Smart Features
Modern Sony systems offer HDMI ARC (Audio Return Channel), which sends TV audio back to the receiver through the same HDMI cable carrying video to the TV. This reduces cable clutter and allows the home theater speakers to handle sound from cable boxes, streaming sticks, and gaming consoles connected to the TV. Verify your TV supports ARC, most post-2015 models do, but older sets may require a separate optical audio cable.
Optical (TOSLINK) and coaxial digital inputs provide alternatives for TVs without HDMI ARC. Both carry multichannel digital audio: optical cables use light pulses (immune to electrical interference), while coaxial uses a standard RCA-style cable. Performance is functionally identical for DVD-quality audio.
USB ports on the receiver let you play MP3s or video files from flash drives, handy for home videos or music libraries not on disc. Some Sony models include Bluetooth for wireless streaming from phones or tablets. Sound quality over Bluetooth is compressed (typically SBC or AAC codec), adequate for background music but noticeably inferior to a CD or DVD’s uncompressed PCM audio.
Analog RCA inputs (red and white stereo jacks) remain useful for connecting older devices: turntables with built-in preamps, cassette decks, or legacy game consoles. If you have vinyl records or VHS tapes, these inputs preserve compatibility.
Smart features vary. Budget Sony systems focus on core DVD and audio functions. Mid-tier models may add FM tuners with preset stations or karaoke modes with microphone inputs and echo effects, niche features that some users love and others never touch. Higher-end units sometimes include network streaming (DLNA) to pull media from a home NAS or PC, though dedicated streaming devices often handle this better.
Check the remote control design. Backlit buttons help in dark rooms: dedicated source-select buttons beat navigating on-screen menus every time you switch from DVD to TV audio.
How to Set Up Your Sony DVD Home Theater System
Safety first: Unplug all components before connecting anything. Wear safety glasses if drilling into walls or ceilings to avoid drywall dust in your eyes.
1. Plan speaker placement. The center channel goes directly above or below the TV, aligned with the screen. Front left and right speakers flank the TV at ear height when seated, angled slightly toward the primary viewing position, typically 22–30 degrees off-center. Rear speakers sit behind the seating area, also at ear height or slightly above, angled down. The subwoofer is less directional: corner placement often reinforces bass, but experiment, moving it a few feet can eliminate boomy resonance caused by room modes.
2. Run speaker wire. Most Sony systems include 16-gauge speaker wire, adequate for runs up to 50 feet. For longer distances (rear speakers in a large room), upgrade to 14-gauge to prevent signal loss. Strip 1/2 inch of insulation from each wire end using wire strippers. Maintain polarity: connect the marked (usually striped or red) wire to the red terminal on both the speaker and receiver. Reversed polarity causes phase cancellation, thinning bass and muddying imaging.
If you’re fishing wire through walls, use CL2 or CL3-rated in-wall speaker cable, it’s fire-rated for concealed installation per NEC Article 725. Standard speaker wire isn’t code-compliant inside walls. Drill holes through studs at least 1-1/4 inches from the stud edge to avoid nail zones, or use protective nail plates if closer.
3. Connect the receiver to the TV. Use an HDMI cable (High Speed or Premium certified) from the receiver’s HDMI OUT (ARC) port to the TV’s HDMI ARC input (often labeled HDMI 1). If your TV lacks ARC, run an optical audio cable from the TV’s optical out to the receiver’s optical in. Set the TV’s audio output setting to “External Speakers” or “Optical” in the TV menu.
4. Connect video sources. Plug cable boxes, game consoles, or Blu-ray players into the receiver’s HDMI inputs. The receiver switches between sources and passes video to the TV while decoding audio for the speakers. This centralizes control, one remote changes inputs instead of juggling multiple devices.
5. Power up and run auto-calibration. Many Sony receivers include an auto-calibration microphone (sometimes called DCAC). Place it at the main seating position, run the calibration routine from the receiver menu, and the system measures speaker distances and levels, adjusting output for balanced sound. This compensates for uneven speaker placement or room asymmetry. The calibration takes 3–5 minutes: stay quiet during measurement.
If your model lacks auto-calibration, manually set speaker distances in the receiver menu using a tape measure (measure from each speaker to the listening position) and adjust individual speaker levels using the receiver’s test tone feature. You want equal volume from each speaker at the seating area.
6. Secure cables and test. Bundle excess speaker wire with velcro cable ties (not zip ties, which can pinch wire insulation). Stapling speaker wire to baseboards works, but leave slack, tight wire can break strands over time as floors settle. According to reviews from home technology experts, proper cable management prevents tripping hazards and keeps setups looking professional.
Play a DVD with a 5.1 surround soundtrack, action movies or concert discs work well. Listen for distinct audio from each speaker: dialogue in the center, music across the front trio, ambient effects in the rears, and bass from the subwoofer. If a speaker is silent, recheck wire polarity and connections. Distortion or buzzing often indicates a loose connection or damaged cable.
7. Mount speakers (optional). Wall-mounting satellite speakers clears floor space and improves sound dispersion in smaller rooms. Locate wall studs with a stud finder and mount brackets directly to studs using 3-inch wood screws for solid support. Drywall anchors work for lighter speakers (under 5 lbs) but can pull out over time. Many product testing labs recommend marking stud locations before starting any wall-mounted installation to ensure secure attachment.
Angle brackets let you tilt speakers toward the seating area. For rear speakers mounted high, aim them to cross above listeners’ heads, direct aim can make effects too localized.
Pro tip: If the subwoofer hums, it’s likely a ground loop (two devices grounded through different outlets creating a voltage difference). Try plugging the subwoofer and receiver into the same power strip, or use a ground loop isolator on the subwoofer’s line-level input.
Permits aren’t typically required for home theater installation since you’re not modifying structure or running line-voltage electrical. If you do open walls for in-wall wire runs, check local codes, some jurisdictions want low-voltage work inspected, though this is rare for residential speaker wire.
Conclusion
A Sony DVD home theater system delivers straightforward surround sound without the complexity of separate components. Focus on proper speaker placement, secure wiring, and taking advantage of auto-calibration features to get the most from the system. With careful setup and attention to the basics, stud-mounted brackets, code-compliant in-wall cable, and balanced speaker levels, the result is immersive audio that transforms a living room into a true home theater.