Table of Contents
ToggleUpgrading from built-in TV speakers to a dedicated home theater system is one of the most impactful improvements a homeowner can make, especially when movie nights and game days are a regular part of life. Sony has been a heavyweight in consumer audio for decades, and their current lineup offers everything from minimalist soundbars to full component surround-sound rigs. The trick is knowing which system matches your room size, budget, and how much wiring you’re willing to tackle. This guide walks through Sony’s offerings, what sets them apart, and how to install them without calling in a pro.
Key Takeaways
- Sony home theater systems deliver balanced sound with crisp dialogue and clean bass across a wide frequency range, with 360 Spatial Sound Mapping technology automatically tuning output to your room’s acoustics.
- Soundbar systems (2.1 to 7.1.2 channels) are ideal for small-to-medium rooms and renters, while component systems with receivers and separate speakers offer superior customization and sound quality for larger spaces over 300 square feet.
- Most Sony home theater systems support HDMI 2.1, eARC, and Dolby Atmos, ensuring compatibility with modern gaming consoles, 4K players, and lossless audio formats from your TV.
- DIY installation is achievable with basic tools—position soundbars centrally below the TV, place component speakers at ear height, and run the auto-calibration via the Sony | Music Center app for optimal results.
- Match your system to room size (small spaces need 2.1–3.1 soundbars; large rooms justify 7.2.4 Atmos rigs) and budget ($500–$1,500 covers most DIY projects with wireless rears or entry-level component setups).
- Proper speaker placement, polarity-correct wiring, and calibration—not expensive gear—are what separate good sound from great sound in a home theater system.
What Makes Sony Home Theater Systems Stand Out
Sony’s reputation in audio engineering goes back to the Walkman era, and that legacy shows in their home theater hardware. Their systems consistently deliver clean, well-balanced sound across a wide frequency range, meaning dialogue stays crisp, bass hits without muddiness, and high notes don’t get shrill.
One standout feature is 360 Spatial Sound Mapping, which Sony rolled out across several 2025 and 2026 models. This tech uses built-in microphones to measure your room’s acoustics, ceiling height, wall spacing, furniture placement, and adjusts output to optimize sound reflection. It’s not a gimmick: rooms with vaulted ceilings or open floor plans benefit noticeably from adaptive tuning.
Sony also integrates HDMI 2.1 support across most mid-to-high-tier models, which matters if you’re running a PlayStation 5, Xbox Series X, or 4K Blu-ray player. That means full bandwidth for 4K/120Hz video and eARC (enhanced Audio Return Channel) for lossless Dolby Atmos or DTS:X audio from your TV back to the receiver or soundbar. If your display supports Variable Refresh Rate (VRR) or Auto Low Latency Mode (ALML), Sony’s gear passes those signals without hiccups.
Build quality is another factor. Sony’s receivers and speakers use rigid cabinets with internal bracing to reduce unwanted resonance. Their wireless subwoofers pair reliably over 5GHz Wi-Fi rather than Bluetooth, which avoids sync lag during explosions or bass-heavy music. And most systems come with Google Chromecast, AirPlay 2, and Spotify Connect built in, so streaming doesn’t require a separate hub.
For DIYers, Sony’s modular approach is helpful. You can start with a soundbar and add rear speakers or a subwoofer later without replacing the entire system, just match the model family and firmware updates handle the rest.
Types of Sony Home Theater Systems for Every Room
Sony splits their home theater lineup into two broad categories: soundbar systems and component systems. Each serves different priorities, and understanding the trade-offs helps avoid buyer’s remorse.
Soundbar Systems: Sleek and Space-Saving Solutions
Soundbars are ideal for renters, small-to-medium rooms (under 300 square feet), or anyone who doesn’t want to drill into walls. Sony’s current soundbar range includes 2.1-channel, 3.1-channel, and 5.1.2-channel configurations.
A 2.1 soundbar has two front speakers (left/right) plus a wireless subwoofer. Models like the Sony HT-S400 are budget-friendly and handle TV dialogue and casual streaming well, but they won’t deliver true surround sound. They’re a solid upgrade from TV speakers without the complexity.
3.1 soundbars add a dedicated center channel for clearer dialogue, crucial if you watch a lot of drama or news. The Sony HT-G700 sits in this category and includes Dolby Atmos support, which bounces sound off the ceiling to simulate overhead audio. It works best in rooms with flat, reflective ceilings under 9 feet tall. Vaulted or textured ceilings scatter the effect.
5.1.2 and 7.1.2 soundbars (like the Sony HT-A7000 or HT-A9) deliver the most immersive experience. These include upfiring drivers for Atmos height channels and either wireless or wired rear satellite speakers. The HT-A9 uses four wireless speakers placed around the room and Sony’s 360 Spatial Sound tech to create phantom surround channels. Setup is straightforward: plug in each speaker, run calibration via the Sony | Music Center app, and the system handles the rest. No speaker wire to fish through walls.
Most Sony soundbars connect to your TV via a single HDMI eARC cable. If your TV is older and lacks eARC, you’ll use HDMI ARC or optical (TOSLINK), but you’ll lose support for lossless audio formats. Check your TV’s HDMI port labels before buying.
Many soundbar models deliver theater-like audio without requiring professional installation or dedicated equipment rooms.
Component Systems: Customizable Audio Performance
Component systems, also called receiver-based or separates systems, offer the highest sound quality and the most flexibility. You’ll buy an AV receiver (the brain), separate speakers (fronts, center, surrounds, and a subwoofer), and connect everything with speaker wire.
Sony’s STR-AN1000 and STR-AZ5000ES receivers are popular in the DIY space. Both support Dolby Atmos, DTS:X, and IMAX Enhanced, and they include room calibration software that adjusts output based on mic measurements taken from your main listening position. The AN1000 is a 7.2-channel receiver (seven speakers, two subwoofer outputs), while the AZ5000ES scales up to 11.2 channels if you want a full Atmos ceiling array.
You’ll pair the receiver with speakers. Sony’s SSCS5 tower speakers or SSCS8 center channel are solid entry points, around $150–$250 per speaker, with 3-way driver designs (tweeter, midrange, woofer) for balanced output. For surrounds, compact bookshelf speakers like the SSCS3 work well mounted on stands or wall brackets.
Subwoofers handle low frequencies (20–200 Hz). A decent powered sub (like Sony’s SA-CS9) uses a 115-watt amplifier and a 10-inch driver. Place it in a corner or along a wall where bass naturally reinforces, and run calibration to avoid boomy hotspots.
Component systems require more labor. Expect to:
• Run 16-gauge or 14-gauge speaker wire from the receiver to each speaker (in-wall rated if you’re fishing wire through studs).
• Mount speakers at ear height for fronts and center (typically 36–42 inches off the floor) and 2–3 feet above ear level for surrounds.
• Install a dedicated 20-amp circuit if your receiver and subwoofer combined draw over 1,500 watts, most mid-tier setups are fine on a standard 15-amp circuit, but check your receiver’s spec sheet.
You’ll also need basic tools: a stud finder, drill/driver, wire strippers, fish tape (if running wire through walls), and a laser level for aligning speaker mounts.
Component setups shine in larger rooms (over 300 square feet), home theaters with acoustic treatment, or if you plan to upgrade speakers over time. Receivers last 8–10 years: you can swap speakers without replacing the whole system.
Choosing the Right Sony System for Your Space and Budget
Matching a system to your room and wallet prevents overspending on features you won’t use, or underspending and regretting it six months later.
Room size is the first filter. For apartments or bedrooms under 200 square feet, a 2.1 or 3.1 soundbar is plenty. You don’t need a 7-channel receiver in a 12×14-foot room: the sound will overwhelm the space and annoy neighbors.
Medium living rooms (200–400 square feet) benefit from 5.1 soundbar systems or entry-level component setups with tower fronts, a center, and bookshelf surrounds. If your room has an open floor plan that connects to a kitchen or hallway, consider a component system, soundbars rely on wall reflections for surround effects, and open layouts scatter that sound.
Large dedicated home theaters (over 400 square feet, especially basements with drop ceilings or media rooms) justify a full 7.2.4 or 9.2.4 Atmos component rig. At this scale, sound quality differences between gear become noticeable, and you’ll appreciate the extra channels.
Budget breaks into three tiers:
• Under $500: Entry soundbars (HT-S400, HT-S2000) or used component gear. Expect 2.1 or 3.1 channels, no Atmos, and limited streaming options. Fine for casual TV watching.
• $500–$1,500: Mid-tier soundbars with Atmos and wireless rears (HT-A5000, HT-A7000) or a basic component setup with an STR-AN1000 receiver and budget tower/bookshelf speakers. This range covers most DIY home theater projects.
• Over $1,500: Premium soundbars (HT-A9 with quad speakers) or separates systems with ES-series receivers and higher-grade speakers. You’re paying for deeper bass extension, lower distortion, and advanced room correction.
Connectivity matters if you’re running multiple sources. Count your devices, game console, Blu-ray player, streaming box, cable box, and ensure the receiver or soundbar has enough HDMI inputs. Most Sony receivers offer 6–8 HDMI inputs: soundbars typically have 2–3. If you’re short on ports, an HDMI switcher works, but it’s one more remote to juggle.
Consider future-proofing. HDMI 2.1, eARC, and Atmos support weren’t standard five years ago, but they’re table stakes now. If you’re investing in a component system, confirm the receiver supports 8K passthrough (even if your TV is 4K today) and firmware updates via Ethernet or Wi-Fi. Sony generally provides 3–5 years of software support for receivers.
Finally, think about aesthetics and spouse approval factor. Soundbars win on clean looks: a single bar under the TV beats five speaker boxes and wire runs. If your partner balks at visible speakers, consider in-wall or in-ceiling speakers for surrounds, Sony’s multi-channel amps can drive them, but installation requires cutting drywall and fishing wire, which jumps the difficulty level.
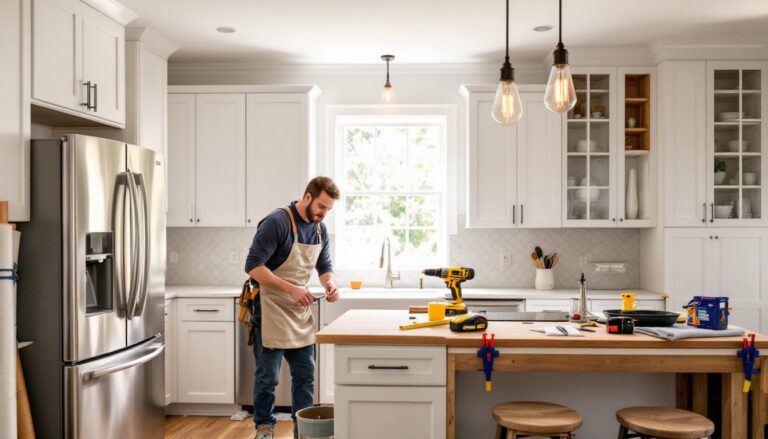
Installation Tips for DIY Home Theater Setup
Installing a Sony home theater system yourself saves $200–$600 in labor costs, and most homeowners with basic tool skills can handle it. Here’s how to tackle it safely and correctly.
Safety First: Wear safety glasses when drilling into walls or ceilings, dust and debris fall straight into your eyes. Use a stud finder and check for electrical wiring or plumbing before drilling. If you’re mounting speakers on exterior walls or near bathrooms, assume pipes or conduit are present. A non-contact voltage tester ($15–$25) helps locate live wires.
Soundbar Installation (Beginner-Friendly):
- Placement: Position the soundbar directly below or above your TV, centered on the screen. If wall-mounting, use the included bracket and ensure it anchors into studs or uses appropriate drywall anchors rated for the soundbar’s weight (typically 10–15 lbs for Sony models).
- Wiring: Run the HDMI eARC cable from the soundbar to your TV’s eARC-labeled HDMI port. If your TV lacks eARC, use HDMI ARC or optical. Plug the soundbar’s power cord into a surge protector, not directly into the wall.
- Subwoofer Placement: Place the wireless sub within 30 feet of the soundbar. Avoid corners if the bass sounds too boomy: try placing it along the front wall, 12–18 inches from the corner, and run calibration to fine-tune.
- Calibration: Use the Sony | Music Center app (iOS/Android) to run auto-calibration. The soundbar emits test tones, measures reflections, and adjusts EQ. This takes 5–10 minutes and noticeably improves dialogue clarity.
Component System Installation (Intermediate):
- Receiver Setup: Place the AV receiver in a ventilated cabinet or on an open shelf, receivers generate heat, and enclosed spaces cause overheating. Leave 3–4 inches of clearance on all sides. Connect your TV to the receiver’s HDMI OUT (eARC/ARC) port, then connect sources (game console, Blu-ray) to HDMI IN ports.
- Speaker Placement:
• Front L/R towers: Flank the TV, 6–10 feet apart, angled slightly inward (toe-in) toward the main seating position.
• Center channel: Directly below or above the TV, ear height when seated (typically 36–42 inches).
• Surrounds: On side or rear walls, 2–3 feet above ear level, angled downward. Dipole surrounds (which fire sound in two directions) work well if seating is close to the wall.
• Subwoofer: Front corner or along the front wall. The “subwoofer crawl” method works: place the sub in your main seat, play bass-heavy content, and crawl around the room’s perimeter to find where bass sounds tightest. Move the sub to that spot.
3. Wiring: Use 16-gauge speaker wire for runs under 50 feet: upgrade to 14-gauge for longer distances or high-power setups (over 100 watts per channel). Strip ½ inch of insulation from each end, twist the strands tight, and connect to the receiver’s binding posts (red for positive, black for negative). Match polarity at both ends, reversed wiring cancels bass and sounds thin. Label each wire at the receiver end (“Front L,” “Surround R,” etc.) with masking tape and a marker.
4. In-Wall Wire Runs (Optional): If hiding wires, use CL2- or CL3-rated speaker wire (rated for in-wall use per NEC guidelines). Fish wire through walls using fish tape or a glow rod, and install low-voltage mounting brackets (“old work” boxes) behind speaker locations for clean connections. Check local codes, some jurisdictions require conduit for low-voltage wiring.
5. Calibration: Sony receivers include a calibration microphone. Place it at ear height in your main seat, run the auto-setup (typically 8–12 test tones across all speakers), and let the receiver set levels, distance, and crossover frequencies. For advanced users, Sony’s receivers allow manual EQ adjustments via the on-screen menu.
Power Considerations: Most home theater systems draw 300–800 watts during peak use, well within a standard 15-amp household circuit (1,800 watts max). But, don’t daisy-chain power strips. Use a single surge protector rated for at least 1,500 watts and 1,500+ joules of surge protection. If you’re adding a projector, amplifier, or other high-draw gear, consult an electrician about a dedicated circuit.
Cable Management: Use Velcro cable ties or zip ties to bundle wires behind the TV stand or receiver rack. If running cables along baseboards, paintable cord covers ($10–$20 for a 5-foot kit) keep things tidy and prevent tripping hazards. Never staple speaker wire, it can nick the insulation and cause shorts.
Many homeowners find guidance on installation techniques and product comparisons through resources like home technology reviews and smart home tech trends, which cover everything from placement strategies to equipment compatibility.
Troubleshooting Common Issues:
• No sound from surrounds: Check wire polarity and confirm the receiver is set to a surround mode (not stereo). Re-run calibration.
• Buzzing or hum: Ground loop interference. Use a ground loop isolator on the subwoofer or receiver’s power cable.
• Dialogue too quiet: Boost the center channel level by +2 to +4 dB in the receiver’s settings. Most movies mix dialogue into the center.
• Bass overpowering: Lower the subwoofer’s gain or move it away from corners.
Conclusion
A well-chosen Sony home theater system transforms how a household experiences movies, games, and music, and with the right prep and installation approach, it’s a DIY-friendly project that delivers results for years. Match the system to your room size and budget, don’t skip calibration, and take time with speaker placement. The difference between good sound and great sound often comes down to a few inches of positioning and a patient setup process.