Table of Contents
ToggleSetting up a home theater doesn’t require a media room or a contractor. A projector kit can transform a living room, basement, or even a backyard into a viewing space that rivals commercial theaters, if you choose the right components and install them properly. Supersonic home theater projector kits bundle the essential gear into one package, making it easier for homeowners to skip the guesswork and get straight to movie night. But not all kits are created equal, and the difference between a crisp, immersive picture and a washed-out disappointment often comes down to understanding what you’re buying and how to set it up. This guide walks through what these kits include, how to install them, and what to watch for before you commit.
Key Takeaways
- A Supersonic home theater projector kit bundles a projector, screen, and mounting hardware into one package, eliminating the guesswork of selecting compatible components separately.
- Native resolution (1080p or higher), brightness (3,500+ lumens for rooms with ambient light), and throw distance are the most critical specs to evaluate when choosing a projector kit.
- Proper mounting to ceiling joists using lag bolts, running cables through walls or raceways, and precise focus and alignment are essential for a reliable installation that rivals commercial theaters.
- Light control through blackout curtains, neutral matte wall paint, and proper seating distance (1.5 to 2.5 times screen width) directly impact picture quality more than equipment specs alone.
- Budget for hidden costs beyond the kit’s purchase price, including mounting hardware ($30–$80), quality cables, a soundbar or receiver ($150+), and lamp replacements every 2–3 years.
- Clean the lens monthly, monitor lamp hours, verify HDMI connections, and maintain at least 6 inches of clearance around projector vents to prevent common issues like dim images and thermal shutdowns.
What Is a Supersonic Home Theater Projector Kit?
A Supersonic home theater projector kit is a bundled package that typically includes a projector unit, a projection screen (or mounting hardware for one), and sometimes basic connectivity cables or mounting brackets. The “Supersonic” branding usually refers to a specific manufacturer known for affordable consumer electronics, though the term has become somewhat generic for budget-friendly all-in-one theater setups.
These kits are designed for homeowners who want a large-screen experience without piecing together components from different manufacturers. Instead of researching projector specs, screen materials, and compatibility separately, you get a matched set that’s supposed to work together out of the box.
Most Supersonic-style kits include an LCD or DLP projector with native resolutions ranging from 720p to 1080p, though some newer models push into 4K territory. Brightness is measured in lumens, expect anywhere from 2,000 to 5,000 lumens in consumer kits. Lower-end models work fine in darkened rooms but struggle in spaces with ambient light.
The screen component varies. Some kits include a retractable pull-down screen with a manual or motorized roller. Others provide a fixed-frame screen or just a white fabric panel. Screen sizes typically range from 80 to 120 inches diagonally, though the actual viewable area depends on the projector’s throw ratio and your room dimensions.
Cables, remote controls, and wall/ceiling mounts may or may not be included. Read the product specs carefully, some “kits” are just the projector and screen with no mounting hardware, meaning you’ll need to budget for brackets and possibly an electrician if you’re running power to a ceiling mount.
Key Features and Components to Look For
When evaluating a projector kit, focus on specs that directly impact picture quality and usability. Native resolution is the first checkpoint. A true 1080p (1920 × 1080) projector delivers sharper images than a 720p model upscaled to “support” 1080p input. If you’re watching HD or 4K content, native resolution matters more than marketing claims.
Brightness (lumens) determines how well the image holds up against ambient light. For a dedicated theater room with blackout curtains, 2,000–3,000 lumens is adequate. For a living room with windows or overhead lights, aim for 3,500+ lumens. Don’t confuse lumens with contrast ratio, high contrast (3,000:1 or better) helps with deep blacks and color pop, but it’s meaningless if the projector isn’t bright enough for your space.
Throw distance and ratio define how far the projector needs to sit from the screen. A standard throw ratio of 1.5:1 means the projector must be 1.5 feet away for every foot of screen width. A 100-inch screen (roughly 87 inches wide for 16:9 aspect) would need about 10.9 feet of throw distance. Short-throw projectors (0.5:1 or less) work in tight spaces but cost more.
Screen material affects brightness and viewing angle. White matte screens are the most common and work well in dark rooms. Gray or ambient light rejecting (ALR) screens improve contrast in brighter environments but can cost as much as the projector itself. If the kit includes a cheap vinyl screen, consider upgrading, it’s often the weakest link.
Connectivity options should include HDMI (preferably HDMI 2.0 or newer for 4K and HDR), USB, and ideally a 3.5mm audio output or optical connection if you’re routing sound to external speakers. Built-in speakers are almost always underpowered: plan on adding a soundbar or receiver.
Check for keystone correction (digital adjustment to fix image distortion when the projector isn’t perfectly aligned) and lens shift (mechanical adjustment that moves the lens without moving the entire unit). Lens shift is preferable because it doesn’t sacrifice resolution the way digital keystone does.
Setting Up Your Supersonic Projector: Step-by-Step Installation
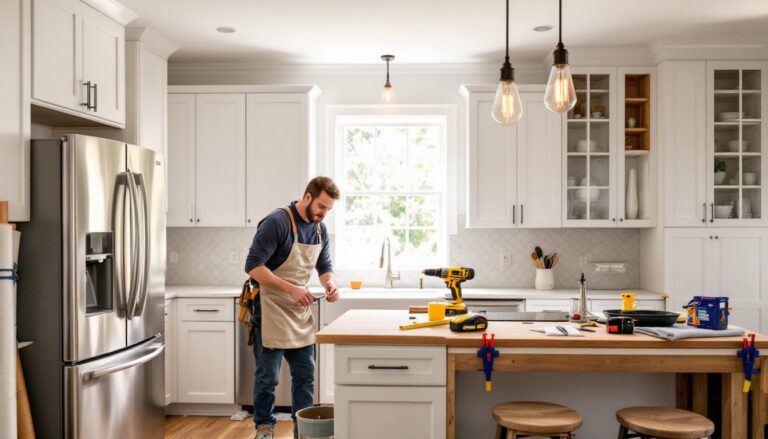
Start by choosing your mounting location. Ceiling mounts provide the cleanest look and keep the projector out of the way, but they require drilling into ceiling joists and possibly running power and HDMI cables through walls or along raceways. Wall shelves or a dedicated projector stand work if you’re renting or don’t want permanent installation.
Safety first: If you’re mounting to drywall, locate ceiling joists with a stud finder. Drywall alone won’t support the weight of a projector and mount, typical projector mounts need to attach to solid wood framing. Use lag bolts (usually 1/4-inch diameter, 2 to 3 inches long) through the mount bracket into the joist. Wear safety goggles when drilling overhead.
Installation Steps:
-
Mark and drill the mount. Hold the ceiling mount plate against the joist, mark screw holes with a pencil, then drill pilot holes slightly smaller than the lag bolt diameter.
-
Attach the mount. Secure the mount plate with lag bolts. If the mount has an adjustable arm, leave it loose until after you attach the projector.
-
Hang the projector. Most mounts use a threaded plate that screws into the bottom of the projector. Attach the plate, then hang the projector on the mount’s arm. Have a second person support the weight, projectors can weigh 8 to 15 pounds.
-
Run cables. If you’re fishing HDMI and power through walls, consider hiring an electrician or low-voltage installer. Running power cable (Romex) inside walls requires an electrical permit in most jurisdictions and must terminate at an outlet box per NEC Article 400. HDMI is low-voltage and doesn’t require a permit, but use CL2 or CL3-rated cable for in-wall runs. Surface-mounted raceways are an easier DIY option.
-
Power on and focus. Plug in the projector, power it on, and adjust the lens focus ring until the image is sharp. Use the keystone or lens shift controls to square the image if it’s distorted.
-
Fine-tune placement. Measure the distance from the screen and adjust the mount arm or shelf position until the image fills the screen without spilling over the edges. Refer to the projector’s throw distance chart in the manual.
If you’re mounting the screen, ensure it’s level and centered. Fixed-frame screens usually hang on French cleats or Z-bar brackets. Motorized or pull-down screens mount to wall studs or ceiling joists with L-brackets.
Optimizing Your Space for Maximum Picture Quality
Light control is the single biggest factor in picture quality. Blackout curtains, cellular shades, or even heavy fabric panels over windows eliminate daytime glare. Recessed can lights or wall sconces on dimmers let you balance ambient lighting for pre-show setup without washing out the image.
Paint the walls a neutral matte color, flat gray or dark blue work best. Glossy or bright white walls reflect light back onto the screen, reducing contrast. If you’re serious about image quality, paint the wall behind the screen a dark color to improve perceived black levels.
Seating distance depends on screen size and resolution. For a 1080p image, sit 1.5 to 2.5 times the screen width away. A 100-inch screen (87 inches wide) means seating 10.9 to 18 feet back. Closer than that and you’ll see pixels: farther and you lose immersion. Some home theater projector guides suggest slightly different ratios based on personal preference and visual acuity.
Screen height should position the center of the image at or slightly below seated eye level. Mounting the screen too high forces viewers to crane their necks. A common rule: bottom edge of the screen 24 to 30 inches above the floor for standard seating.
Projector placement should avoid obstacles between the lens and screen. Ceiling fans, light fixtures, and hanging plants all create shadows. If you must place the projector off-center, use lens shift instead of keystone correction, digital keystone crops pixels and softens the image.
Sound routing deserves attention. Most projector kits include weak built-in speakers or none at all. A basic soundbar with a wireless subwoofer runs $150 to $300 and dramatically improves dialogue clarity and bass. For true surround sound, invest in a 5.1 or 7.1 AV receiver and speaker package, but expect to spend $400+. Run speaker wire along baseboards or through walls using the same low-voltage techniques as HDMI.
Troubleshooting Common Issues and Maintenance Tips
Image is dim or yellowish: Projector lamps degrade over time. Most lamps last 3,000 to 6,000 hours depending on usage mode (eco mode extends life but reduces brightness). Check the lamp hour counter in the projector’s menu. Replacement lamps cost $50 to $200. Turn off the projector properly using the remote, cutting power abruptly shortens lamp life.
Image is blurry or soft: Clean the lens with a microfiber cloth and lens cleaner, never spray cleaner directly on the lens. Dust buildup on the lens or internal mirrors degrades sharpness. Also double-check focus and ensure the projector is square to the screen. If using keystone correction, reduce it, digital correction always softens the image.
No picture or “No Signal” error: Verify HDMI cable connections at both ends. Try a different HDMI port or cable, cheap cables fail, especially over runs longer than 15 feet. For long runs (25+ feet), use an active HDMI cable or fiber optic HDMI. If connecting through an AV receiver, confirm the receiver is set to the correct input.
Overheating or auto-shutdown: Projectors generate heat and rely on internal fans for cooling. Blocked air vents cause thermal shutdown. Leave at least 6 inches of clearance around intake and exhaust vents. Clean dust filters monthly using compressed air or a vacuum with a brush attachment. If the fan is loud or rattling, it may need replacement.
Color banding or rainbow artifacts: DLP projectors (common in budget kits) can produce rainbow flashes, brief streaks of red, green, and blue, especially noticeable to people with fast eye movements. This is a limitation of single-chip DLP technology. LCD projectors don’t have this issue but may show a faint “screen door effect” (visible pixel grid). Neither is fixable: it’s inherent to the technology. Reviews on sites like Tom’s Guide often call out which models minimize these artifacts.
Regular maintenance: Dust the exterior and vents monthly. Replace the lamp when the image dims noticeably or the projector displays a lamp warning. Store the remote in a drawer to avoid losing it, replacement remotes can be hard to find for budget brands. Keep the lens cap on when not in use to prevent dust accumulation.
Cost Considerations and Budget-Friendly Alternatives
Supersonic and similar budget projector kits typically range from $150 to $500, depending on resolution and included accessories. That’s an attractive entry point, but understand what you’re getting. A $200 kit won’t compete with the best projectors for home theater costing $800 to $2,000, but it can deliver a satisfying big-screen experience in a controlled environment.
Hidden costs add up. If the kit doesn’t include mounting hardware, budget $30 to $80 for a ceiling mount. HDMI cables longer than 6 feet cost $15 to $40 depending on length and quality. A decent pull-down screen (if not included) runs $80 to $200. Add a soundbar or speaker setup, and you’re easily at $400 to $700 total.
Lamp replacement is a recurring expense. At 4 hours of use per day, a 3,000-hour lamp lasts about 2 years. Replacement lamps for budget projectors cost $50 to $100. Higher-end models use LED or laser light sources with 20,000+ hour lifespans, eliminating lamp replacement for a decade or more, but those projectors start at $600.
Alternative approaches depend on your priorities. If you already own a laptop or tablet, some mini projectors connect via USB-C and cost under $150, though image quality and brightness are limited. Refurbished name-brand projectors (Epson, BenQ, Optoma) often outperform new budget models and can be found for $300 to $500.
DIY screen alternatives save money. A piece of blackout cloth stapled to a wooden frame costs $40 in materials and works surprisingly well. Some people paint a wall with screen paint ($60 to $100 per gallon, covers about 100 square feet with two coats) for a permanent, frameless screen.
Renting makes sense for one-time events. Party rental companies offer projector and screen packages for $100 to $200 per weekend, cheaper than buying if you only need it once or twice a year.
Conclusion
A Supersonic home theater projector kit can turn an ordinary room into a personal cinema without a major renovation or electrician’s invoice, if you match the equipment to your space and install it correctly. Focus on the specs that matter, control your lighting, and don’t skip the mounting and cable management steps. The difference between a frustrating setup and a reliable home theater often comes down to an extra hour of prep work and a stud finder.