Table of Contents
ToggleHome remodeling isn’t just about fresh paint and new fixtures, it’s about making your house work harder for you. Whether you’re planning to sell in a few years or settling in for the long haul, strategic upgrades can boost property value, cut energy costs, and make daily life genuinely more comfortable. The best projects balance sweat equity with return on investment, turning tired spaces into functional, attractive rooms you’ll actually use. Here’s a breakdown of the top remodeling projects worth tackling in 2026, ranked by impact, feasibility, and what homeowners are actually asking contractors to build.
Key Takeaways
- Kitchen and bathroom remodeling deliver the highest ROI at 60–80% and 50%+ respectively, making them top home remodeling investments for both resale value and daily comfort.
- Basement finishing adds 500–1,500 square feet of livable space for $30–$75 per square foot, but addressing moisture issues and egress requirements must come before framing.
- Decks and outdoor living spaces return 70–80% of investment, especially in warm climates, with proper foundation footings below frost line and careful ledger board attachment being critical to longevity.
- Master bedroom suite conversions require plumbing-intensive work that typically needs professional installation, but they significantly boost function and resale appeal for growing families.
- Energy-efficient window and door replacements reduce heating and cooling costs by 10–25%, with proper installation, flashing, and sealant application being just as important as the product quality itself.
- Budget 10–20% beyond estimates for cost overruns and hidden problems like rot or outdated wiring; prioritize projects that improve daily living over appearance alone.
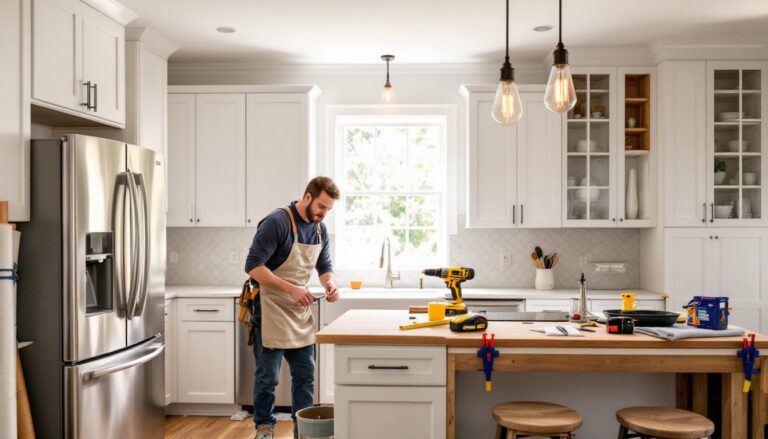
Kitchen Remodeling: The Heart of Your Home
Kitchen remodels consistently deliver the highest return on investment, recouping 60–80% of costs at resale depending on scope and finishes. But ROI aside, a functional kitchen makes cooking, entertaining, and even morning coffee less of a chore.
Start by identifying your pain points: inadequate storage, outdated appliances, poor workflow, or just ugly cabinets. A full gut-and-rebuild runs $25,000–$75,000+ in most markets, but you don’t always need to go that deep. Cabinet refacing (new doors, drawer fronts, and veneer over existing boxes) costs half what replacement does and takes a week instead of a month. Pair that with new hardware, a quartz or butcher-block countertop, and a tile backsplash, and you’ve got a different room.
If you’re rearranging the layout, moving sinks, adding islands, or relocating gas lines, you’ll need permits and likely a licensed plumber and electrician. Load-bearing walls require structural engineering sign-off. Don’t skip this: inspectors will catch it, and buyers’ home inspectors definitely will.
Appliance upgrades matter more than most DIYers think. Energy Star–rated refrigerators and dishwashers cut utility bills and appeal to buyers. Induction cooktops are faster and safer than gas or electric coil, though they require 240V circuits if you’re upgrading from a standard range.
Flooring often gets overlooked until the end, but it ties the room together. Luxury vinyl plank (LVP) is waterproof, durable, and DIY-friendly. Porcelain tile is tougher but requires a wet saw and patience. Hardwood looks great but needs sealing in high-moisture areas near sinks.
One last thing: don’t cheap out on lighting. Undercabinet LEDs, pendant lights over islands, and recessed cans on dimmers make the space usable at any hour and show off your work when you’re done.
Bathroom Upgrades That Add Value and Comfort
Bathrooms are the second-highest ROI remodel, and they’re often the easiest to DIY if you’re not moving plumbing. A powder room refresh, new vanity, mirror, paint, and lighting, can be done in a weekend for under $1,000. A full primary bath remodel with tile, new fixtures, and a walk-in shower runs $10,000–$30,000, depending on finishes.
Tile is where most bathroom projects get expensive and time-consuming. Subway tile is affordable and classic: large-format porcelain (12×24 or bigger) covers more area with fewer grout lines. Waterproofing matters more than the tile itself, use a RedGard or Kerdi membrane behind any wet area, not just paint-on sealers. Skipping this invites mold and structural rot.
Vanities have come a long way from the builder-grade particle-board boxes. Freestanding models with open shelving or legs make small baths feel bigger. Wall-hung vanities do the same but require blocking (2×6 or 2×8 lumber) anchored to studs during framing. If you’re retrofitting, locate studs and use heavy-duty toggle bolts rated for the vanity’s weight plus contents.
Ventilation isn’t optional. A bath fan rated for your room’s cubic footage (CFM = length × width × height ÷ 7.5) prevents mold and peeling paint. Code requires them in bathrooms without operable windows in most jurisdictions. Installing one means running ductwork to an exterior vent, doable for a DIYer with attic access, but messy.
Walk-in showers with curbless entries are aging-in-place features that appeal to all buyers. They require sloped subfloors and linear drains, which means tearing up the existing floor and possibly lowering joists. Not a simple weekend project, but planning home improvements as an owner early ensures you’re ready for the work involved.
Basement Finishing: Maximize Your Home’s Potential
Finishing a basement adds livable square footage without expanding your footprint, 500 to 1,500 square feet in most homes. Costs run $30–$75 per square foot for a basic finish (framing, drywall, flooring, lighting), more if you’re adding a full bath or wet bar.
Before you frame a single wall, address moisture. Basements below grade are prone to water intrusion. Check for efflorescence (white powdery deposits), staining, or musty smells. If you’ve got active leaks, fix exterior drainage, gutters, and grading first. A sump pump and interior or exterior waterproofing may be necessary. Framing over a damp slab is a waste of time and materials.
Code requires egress windows in any basement bedroom, minimum 5.7 square feet of opening, 24-inch-tall opening, and 20-inch-wide opening, with a sill no more than 44 inches above the floor. Installing one means cutting through foundation walls and digging an egress well outside. Not DIY-friendly unless you’ve got concrete-cutting experience and a good relationship with your building inspector.
Framing basement walls is straightforward: 2×4 studs on 16-inch centers work for non-load-bearing partitions. Use pressure-treated bottom plates on concrete slabs. Insulate exterior walls with rigid foam (R-10 minimum) or closed-cell spray foam to prevent condensation. Fiberglass batts invite mold if moisture gets behind them.
Flooring options depend on your subfloor. If the slab’s dry and level, luxury vinyl plank (LVP) installs right over it with a thin underlayment. Engineered hardwood works, too. Carpet feels warmer underfoot but holds moisture and odors, use it sparingly, and choose mold-resistant padding.
Electrical and HVAC are often the hidden costs. Adding circuits for lighting, outlets, and a bathroom requires pulling permits and possibly upgrading your panel. Extending ductwork for heating and cooling keeps the space usable year-round but means cutting into existing runs and balancing airflow.
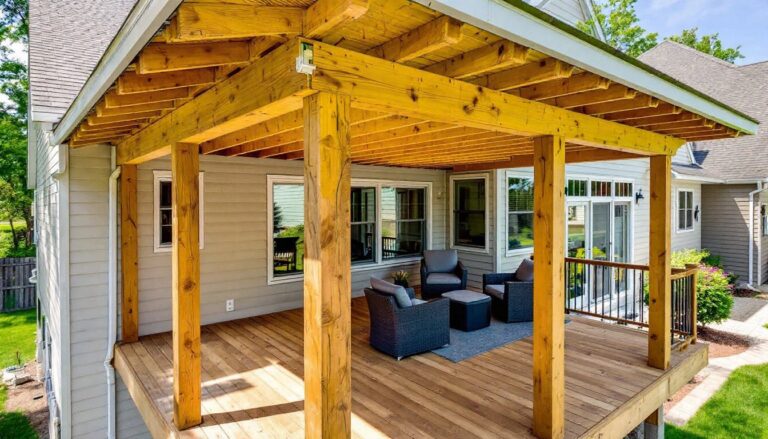
Outdoor Living Spaces and Deck Additions
Decks and patios extend your living space and deliver strong ROI, around 70–80%, especially in warm climates. A 12×16-foot pressure-treated deck costs $3,000–$6,000 in materials for a DIYer: composite decking (Trex, TimberTech) runs double but requires less maintenance.
Pressure-treated pine is the budget choice. It’s durable if sealed every 2–3 years. Look for lumber marked .40 or .60 treatment retention for ground contact: posts and beams in or touching soil need the higher number. Joists are typically 2×8 or 2×10 on 16-inch centers for residential decks: consult span tables based on your joist species and spacing.
Composite decking won’t rot, splinter, or need staining, but it expands and contracts more than wood. Follow the manufacturer’s gapping specs (usually 1/8–1/4 inch) or you’ll get buckling in summer. Hidden fasteners give a clean look but add labor time.
Foundation matters. Concrete footings below frost line (check local codes, 12 inches in the South, 42+ inches in the upper Midwest) prevent heaving. Precast pier blocks work for low, freestanding decks but aren’t allowed for attached structures in most jurisdictions.
Attaching a ledger board to your house is the trickiest part. It must be bolted (not nailed) through siding into the rim joist or band board, with flashing above to prevent water infiltration. Use 1/2-inch lag bolts or through-bolts every 16 inches. This connection carries half the deck’s live load, don’t skimp.
Railings are required by code for decks over 30 inches above grade. Balusters must be spaced so a 4-inch sphere can’t pass through. Cable rail systems look sleek but cost more and require tensioning tools. Many homeowners reference cost estimators and guides on HomeAdvisor to budget deck projects before starting.
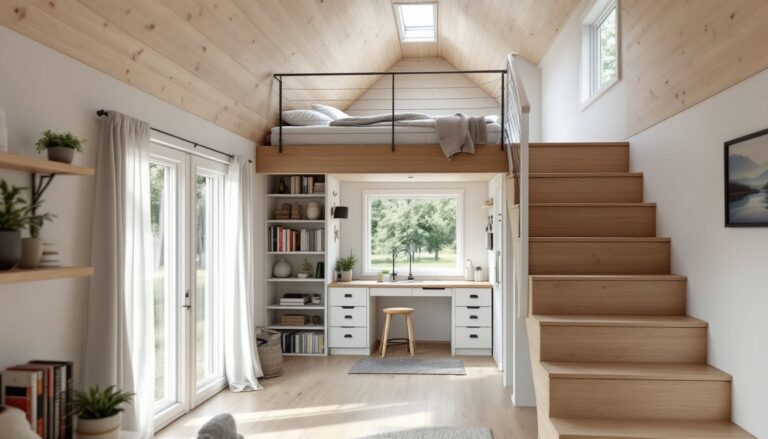
Master Bedroom Suite Conversions
Converting an existing bedroom, bonus room, or portion of an oversized primary into a master suite, complete with walk-in closet and en-suite bath, is a top request for growing families and empty nesters alike. It’s structural, plumbing-intensive, and often requires permits, but the payoff in function and resale value is real.
Start with layout. You need space for a bed, nightstands, seating (if desired), plus a 5×8-foot minimum bathroom and ideally a 6×8-foot walk-in closet. Borrowing space from an adjacent bedroom or hallway is common. If you’re adding square footage, that’s new construction: foundation, framing, roofing, siding, well beyond most DIYers’ scope.
Plumbing is the expensive part. Running 3-inch drain lines (for toilets) and supply lines to a new bathroom means opening walls, floors, or ceilings. If you’re on a slab, you may need to core-drill or run lines overhead. Venting must tie into the main stack or run to an exterior vent per code. Hire a plumber unless you’ve done this before.
Electrical is more forgiving. Bedrooms require outlets every 12 feet along walls, one on each wall 2 feet or longer, per NEC. Bathrooms need GFCI-protected outlets and dedicated 20-amp circuits for high-draw items (hairdryers, heated floors). Closets need lighting but not within 12 inches of storage (fire hazard).
Closet buildouts can be DIY-friendly. Wire shelving (ClosetMaid, Rubbermaid) is cheap and adjustable. Solid wood or melamine systems (from IKEA, Container Store, or custom) look cleaner and support more weight. Include double-hang sections for shirts and single-hang for dresses or coats.
Soundproofing between the new bath and bedroom improves livability. Use resilient channel or sound-isolation clips on studs, then 5/8-inch drywall. Rockwool or fiberglass batts in the stud bays help, too. Don’t forget to insulate exterior walls to current code (R-13 to R-21 depending on climate zone).
Energy-Efficient Window and Door Replacements
Replacing old, drafty windows and exterior doors cuts heating and cooling costs by 10–25% and makes rooms noticeably more comfortable. Energy Star–rated windows with Low-E coatings and argon or krypton gas fills perform best, especially in extreme climates. Costs run $300–$1,000+ per window installed, depending on size, type (double-hung, casement, slider), and frame material.
Vinyl frames are the most affordable and low-maintenance. Fiberglass is stronger, more thermally stable, and paintable but costs 20–30% more. Wood offers classic looks and excellent insulation but requires periodic painting or staining. Aluminum is durable but conducts heat, making it a poor choice for energy efficiency unless it’s thermally broken.
Installation matters as much as the window itself. The opening must be square, level, and properly flashed to prevent water intrusion and air leaks. Use a quality sealant (polyurethane or silicone) and low-expansion foam around the frame. Over-foaming can bow the jamb and prevent the sash from operating smoothly.
Door replacements follow similar logic. A steel or fiberglass entry door with a foam core provides better security and insulation than old hollow-core wood. Prehung units (door already mounted in a frame) simplify installation, remove the old frame, shim the new one level and plumb, then screw through the jamb into studs. Exterior doors need a sill pan or flashing membrane under the threshold to shed water.
Sliding patio doors and French doors are common upgrades. Look for multi-point locking systems and impact-resistant glass if you’re in a hurricane zone. Properly installed doors shouldn’t leak air: check weatherstripping annually and replace it when compressed or cracked.
Many municipalities offer rebates for energy-efficient window and door upgrades. Check with your utility company or state energy office. Homeowners looking for project inspiration often browse remodeling tutorials on This Old House before committing to window replacements, and cost breakdowns from renovation guides on ImproveNet help set realistic budgets.
Conclusion
Remodeling is as much about strategy as skill. Prioritize projects that improve how you live day-to-day, not just what looks good in photos. Budget for 10–20% cost overruns, hidden problems (rot, outdated wiring, asbestos) are common in older homes. And remember: some projects pay you back in comfort and utility bills long before you sell. Choose the ones that match your timeline, skill level, and the way your household actually functions.